

Updated February 10, 2026
Vertigo is the ultimate vertical map in CS2. Set on a construction site high above the city, this two-story layout forces you to think up and down, not just left and right. The scaffolding, ramps, and floor holes create angles that don’t exist on traditional maps. Miss a callout here and your teammate gets shot from above or below with no warning.
Communication on Vertigo isn’t optional – it’s survival. With sites stacked on different floors and multiple ways to move between them, your team needs to know exact positions and which level enemies are on. Top or Bottom isn’t extra detail, it’s the difference between holding the right angle and getting destroyed.

List of All Vertigo Callouts
T Spawn Area
- T Spawn – Terrorist starting position on the upper construction level. Teams split toward Mid or Ramp from here.
- T Stairs – The staircase leading down from T Spawn. First major chokepoint Ts have to clear.
- T Ramp – The ramped pathway from T side leading toward A. Watch for CT aggression here.
Mid Section
- Mid – Central area connecting both sites on the upper level. Critical for map control.
- Sandbags – Sandbag position in Mid providing cover. Common hold spot for both sides.
- Yellow – The area with yellow construction materials in Mid. Easy visual reference.
- Tarp – Large blue tarp covering part of Mid. Named for the obvious visual.
- Mid Doors – The doorway connecting Mid to the main structure. Frequent contact point.
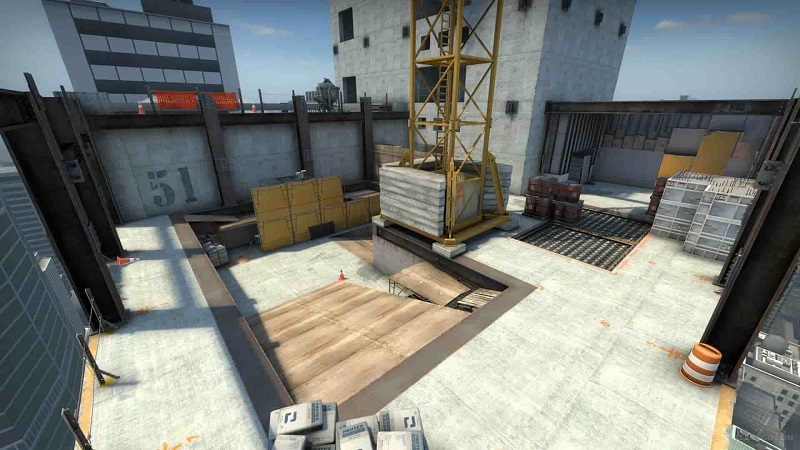
A Site
- A Site – Upper bomb site on the main level. Has significant vertical play.
- Ramp – The main ramp entry to A site from T side. Gets heavily util-ed every round.
- Rafters – Elevated metal beams above A site. Dangerous off-angle position.
- Boxes/A Boxes – Stack of boxes on A site providing cover. Common plant position.
- Default – Standard A plant location, usually near the boxes for cover.
- Scaffolding/Scaffold – Metal framework on A site. Provides vertical angles and cover.
- Stairs/A Stairs – Staircase on A site connecting to lower levels. Critical rotation path.
- Elevator – The elevator shaft area on A. Can peek down to lower levels.
- Headshot – Small elevated position on A where only heads are visible. Named for obvious reasons.
B Site
- B Site – Lower bomb site beneath the main structure. Accessed by going down.
- Ramp/B Ramp – The main ramped entrance to B from upper level. Always specify B to avoid confusion with A Ramp.
- Bottom Ramp/Ramp Bottom – The lower exit of B Ramp onto the site itself.
- Pipes – Large industrial pipes on B site. Good cover and reference point.
- Yellow – Yellow container on B site. Not the same Yellow as Mid.
- Back Site/Back B – The rear area of B site furthest from Ramp. Where CTs rotate in.
- B Default – Standard plant spot on B, usually in the open for post-plant control.
- Ladder – Ladder on B site connecting to upper levels. Alternative rotation path.
- Generator/Gen – Large generator unit on B site. Provides cover and common hold position.
CT Spawn Area
- CT Spawn – Counter-Terrorist starting position on upper level. Central for rotations.
- CT Mid – CT approach to Mid control from spawn.
- Connector – Hallway connecting CT spawn to other areas. Used for quick rotations.
Alternative and Regional Callouts
Some callouts vary by region or team preference:
- Scaffold vs Scaffolding – Same structure on A. Scaffold is just shorter.
- Rafters vs Beams – The metal structure above A. Rafters is more common.
- Gen vs Generator – The large unit on B. Gen is quicker in mid-round calls.
- Headshot vs HS – The elevated position on A. HS is common shorthand.
- Yellow confusion – Yellow exists in both Mid and B. Always specify which area when using this call.
Tips from Professionals on Vertigo Callouts
- Always call the level – Top or Bottom changes everything. An enemy on Top Mid versus Bottom Ramp are totally different threats.
- Specify which Ramp – A Ramp and B Ramp are on opposite sides of the map. Never just say Ramp.
- Watch for vertical plays – Call if enemies are above or below expected positions. Rafters, Ladder, and Elevator create unusual angles.
- Yellow needs context – Mid Yellow and B Yellow are different. Always add the area when calling Yellow.
- Call elevator peeks – If someone’s watching down from Elevator on A, that’s crucial info for site takes.
- Rafters is game-changing – This off-angle can wipe teams. Call it immediately if someone’s up there.
- Mid control is layered – You can control Mid without controlling Sandbags or vice versa. Be specific.
- Count players going down – When Ts go to B, that’s a level change. Your team needs to know how many went down.
- Headshot needs pre-aim – Call this position early so teammates can pre-aim the angle. It’s almost impossible to react to.
- Rotation timing matters more – Vertigo rotations take longer because of the vertical movement. Call early and call loud.

I’m John Stevens, guy who is completely passionate about playing CS2. For me, it’s not just a hobby, it’s a way of life. I spend most of my time developing strategies, practicing, and participating in amateur championships.
Through this blog, I aim to inspire, entertain, and unite other gamers.
So join me on this incredible journey through the cs2 world. Together, we will explore the ins and outs of CS2, discuss the latest gaming news, and dive into the exciting world of eSports. My blog is created to provide insights, reviews, and thought-provoking content that will keep you coming back for more.